
In the previous chapter, our goal was to create a simple Three.js scene composed of a rotating cube. To do this, we instantiated a 3D Mesh object, composed of a Geometry and a Material.
The Geometry used for our cube was a BoxGeometry type.
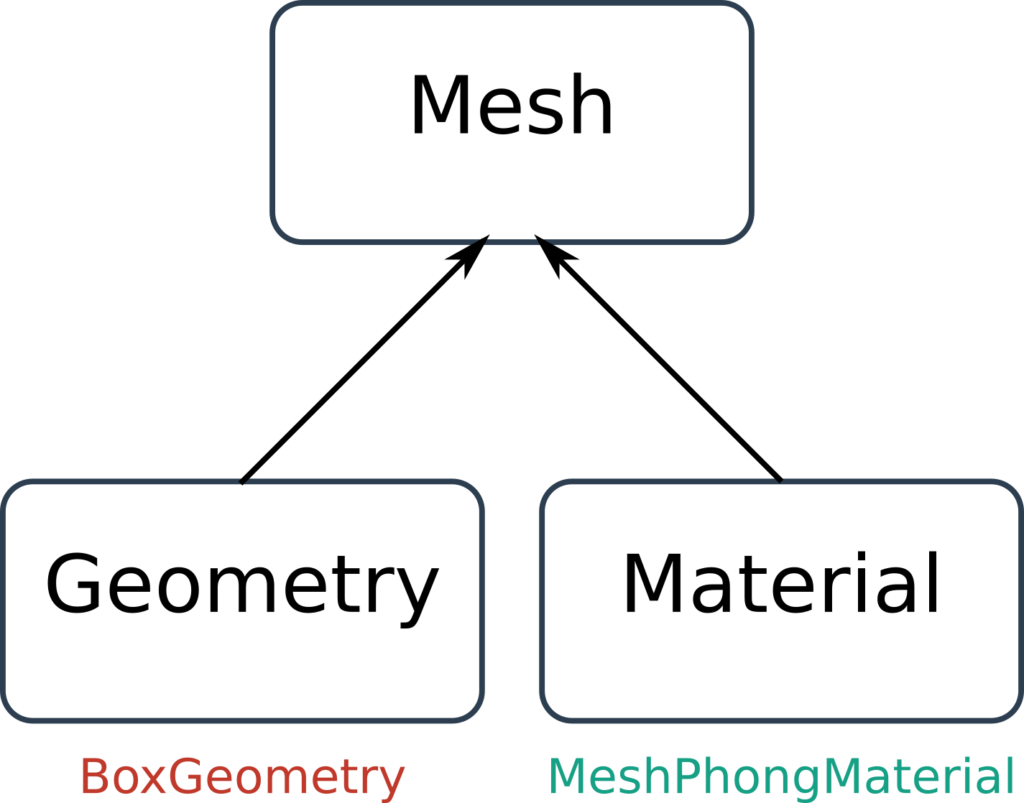
MeshHowever, there are many other types of Geometry natively included in Three.js ! In this chapter, we will discover the main ones.
For a better understanding, I strongly advise you to read chapter 2 if you haven’t already done so !
If you are ready, we can start !
The main types of Three.js Geometry structures
Three.js provides us with a lot of different Geometry structures. The objective of this chapter is to discuss about the main ones :
BoxGeometryConeGeometryCylinderGeometryPlaneGeometrySphereGeometry
The others, more complex, will be discussed later !
Introduction
As a reminder, Geometry classes are 3D structures used to give a shape to a 3D object. A number of them are natively included in Three.js.
It is common to use these basic structures to model simple objects in our scene, or simply to practice.
In most advanced projects, the creation of 3D models is outsourced to a modeling software. Then, in a second step, the 3D models are directly imported into the Three.js project – we will study this case in the following chapters !
BoxGeometry
Let’s take the code from the previous chapter, it will serve as a basis throughout this chapter :
const geometry = new THREE.BoxGeometry( 150, 150, 150 );
const material = new THREE.MeshPhongMaterial( {color: 0x00ffff} );
cube = new THREE.Mesh( geometry, material );
scene.add( cube );
See the Pen Hello World by Thomas (@thomassifferlen) on CodePen.
The cubic shape of our 3D object is due to the use of the BoxGeometry class. The constructor of this class accepts three parameters:
- X – Size of the structure on the X axis
- Y – Size of the structure on the Y axis
- Z – Size of the structure on the Z axis
In our case, these three values are identical to give our object a cubic shape. But it is possible to modify these values to create the rectangular parallelepiped of our choice!
ConeGeometry
Based on the previous code, we use the ConeGeometry class to instantiate a cone structure :
const geometry = new THREE.ConeGeometry( 150, 150, 15 );
const material = new THREE.MeshPhongMaterial( {color: 0x00ffff} );
cone = new THREE.Mesh( geometry, material );
scene.add( cone );
See the Pen ConeGeometry by Thomas (@thomassifferlen) on CodePen.
The constructor of this class accepts three parameters:
- Radius – Cone radius size
- Height – Height of the cone
- Complexity of the structure – Number of segments of the radius
CylinderGeometry
Based on the previous code, we use the CylinderGeometry class to instantiate a cylindrical structure :
const geometry = new THREE.CylinderGeometry( 150, 150, 300, 8, 4 );
const material = new THREE.MeshPhongMaterial( {color: 0x00ffff} );
mesh = new THREE.Mesh( geometry, material );
scene.add( mesh );
See the Pen CylinderGeometry by Thomas (@thomassifferlen) on CodePen.
The constructor of this class accepts five parameters:
- Upper radius – Radius size of the upper face of the structure
- Lower radius – Radius size of the lower face of the structure
- Height – Height of the cylinder
- Radius segments – Number of radius segments of the structure
- Height segments – Number of segments on the height of the structure
PlaneGeometry
The PlaneGeometry class allows to instantiate a Geometry of type 2D plane. The constructor of this class accepts four arguments:
- Width – Width of the structure on the X axis
- Height – Height of the structure on the Y axis
- Number of segments on the width
- Number of segments on the height
Based on the previous code, let’s use PlaneGeometry to instantiate a 2D plane:
const geometry = new THREE.PlaneGeometry( 250, 150, 2, 2 );
const material = new THREE.MeshPhongMaterial( {color: 0x00ffff, side : THREE.DoubleSide} );
mesh = new THREE.Mesh( geometry, material );
scene.add( mesh );
Be careful ! The DoubleSide property of Material is necessary here to be able to observe the object from all angles – We will talk about this in the chapter about Material classes.
See the Pen PlaneGeometry by Thomas (@thomassifferlen) on CodePen.
Sphere Geometry
Based on the previous code, we use the SphereGeometry class to instantiate a spherical structure:
const geometry = new THREE.SphereGeometry( 250, 32, 32 );
const material = new THREE.MeshPhongMaterial( {color: 0x00ffff} );
mesh = new THREE.Mesh( geometry, material );
scene.add( mesh );
See the Pen SphereGeometry by Thomas (@thomassifferlen) on CodePen.
The constructor of this class accepts three parameters :
- Radius – Size of the sphere’s radius
- Complexity Width – Number of segments on the width
- Complexity Height – Number of segments on the height
Conclusion
In this third chapter, we discovered five Three.js Geometry structures. There are many other geometric structures natively offered in the library, but we will study them in the next posts.
Feel free to download the complete Three.js University guide to progress even faster !
There are still a lot of Three.js geometry structures to learn ! In chapter 3 of the downloadable guide, we will discover in detail more than a dozen Geometry classes!
You can download the complete guide here :
The next chapter will deal with the different Material classes and their specificities, so that we can modify the visual aspect of our 3D objects !
[…] Chapter 3 – The principal types of Three.JS Geometry Tags3D renderAmbientLightConstructorGeometryHello WorldLightingloopmeshMeshPhongMaterialPerspectiveCamerathree.jswebglWebGLRenderer […]
[…] Chapter 2 – A Hello World with Three.JS Chapter 3 – The principal types of Three.JS Geometry […]
[…] thomassifferlen 3 commentaires Available in English […]