
This chapter is the second part of the programming tutorial for our Tower Defense style game with Three.JS.
This tutorial is available in video format!
To start, I suggest you begin with the first part:
Introduction
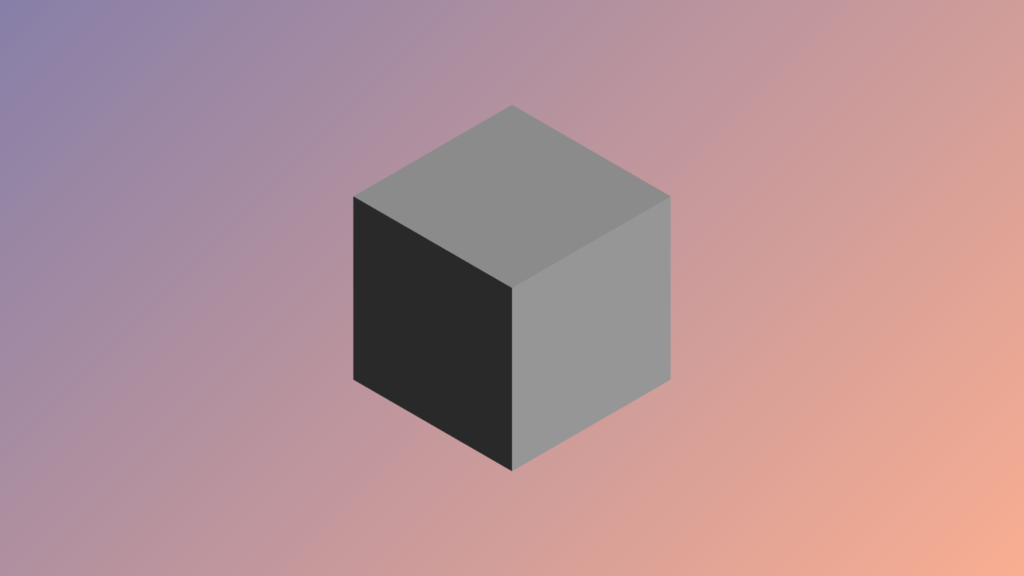
In the previous part, we were able to create a basic universe composed of principal actors of Three.JS (camera, scene, lighting… ) and a cube in the center of the scene.
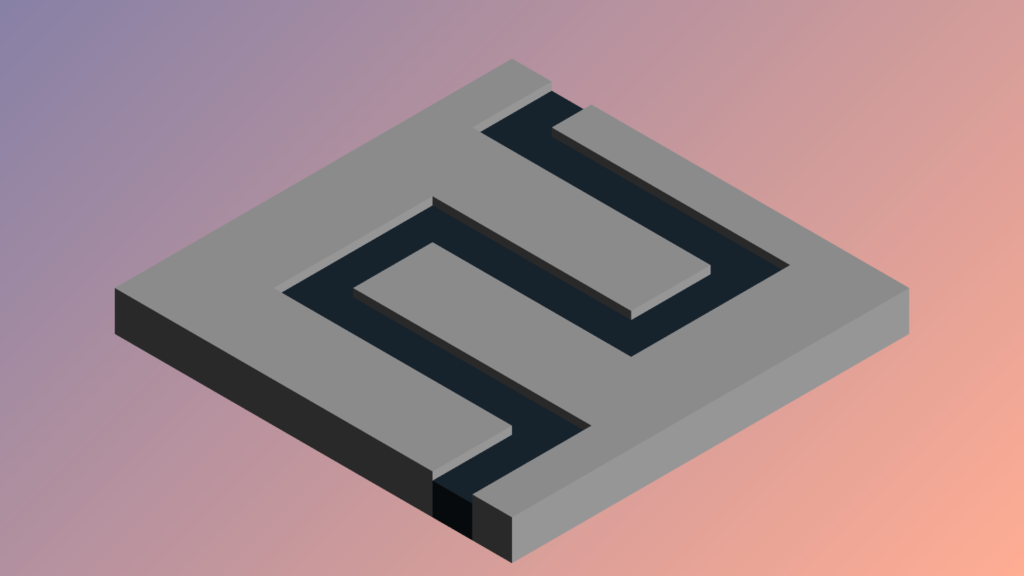
In this second part of our project, we will develop the functionalities linked to the dynamic loading of the game map. Her is a visual of our objective :
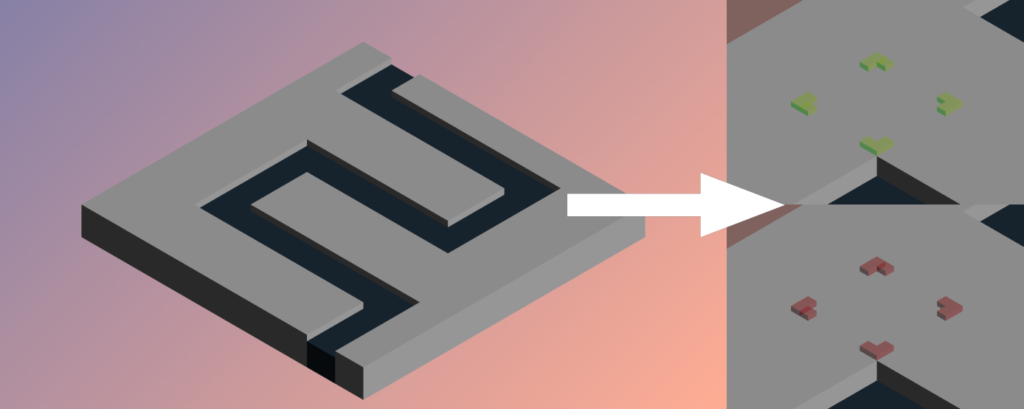
Dynamic Loading of the Game Map
Creating the JavaScript module map.js
Let’s begin by creating a JavaScript module in a new file : map.js. Let’s begin by including Three.JS inside :
// --- map.js ---
import * as THREE from '../js/build/three.module.js';
The Data of the Game Map
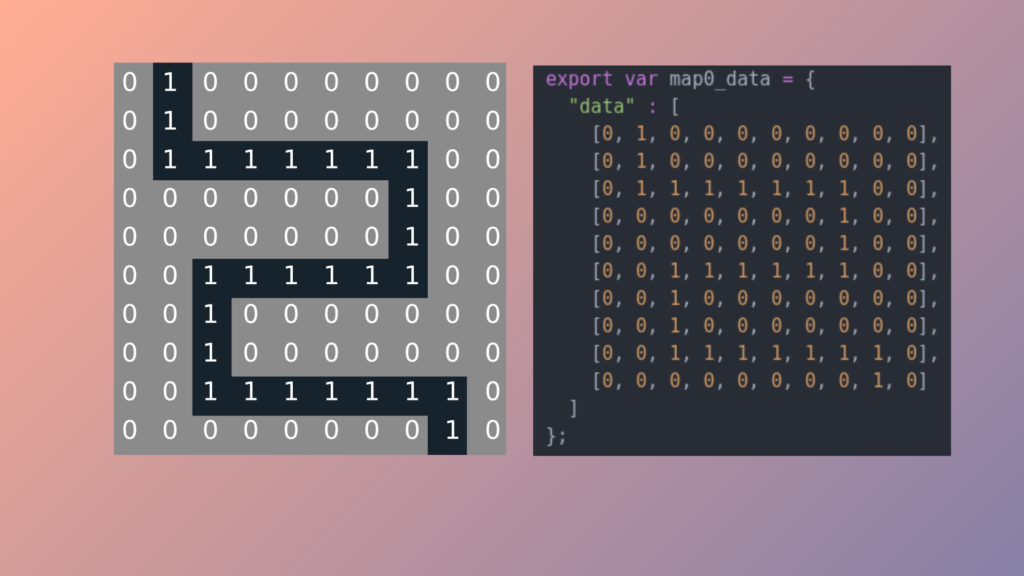
Next, let’s create a JavaScript object composed of a two dimensions Array in the data index . It is in this variable that the composition of our game map will be stocked :
// ATTENTION - For this game, map width and length will be the same !
export var map0_data = {
  "data" : [
    [0, 1, 0, 0, 0, 0, 0, 0, 0, 0],
    [0, 1, 0, 0, 0, 0, 0, 0, 0, 0],
    [0, 1, 1, 1, 1, 1, 1, 1, 0, 0],
    [0, 0, 0, 0, 0, 0, 0, 1, 0, 0],
    [0, 0, 0, 0, 0, 0, 0, 1, 0, 0],
    [0, 0, 1, 1, 1, 1, 1, 1, 0, 0],
    [0, 0, 1, 0, 0, 0, 0, 0, 0, 0],
    [0, 0, 1, 0, 0, 0, 0, 0, 0, 0],
    [0, 0, 1, 1, 1, 1, 1, 1, 1, 0],
    [0, 0, 0, 0, 0, 0, 0, 0, 1, 0]
  ]
};
Our double array will have the same length in both dimensions!
The keyword export is used to export our variable outside of the map.js module , within index.html.
Each coordinate of the double Array of our variable represents a block of our game map :The value 0 represents a normal case:
- The value
0represents a normal case - The value
1represents a case of the path that will be taken by the enemies.
The loadMap function
Continuing in the module map.js , let’s create a loadMap function. This function accepts two parameters :
mapdata– A structure of map data (equivalent to the map0_data variable ).scene– A Three.JS scene
export function loadMap(mapdata, scene)
{
    [...]
}
In the body of this function, let’s create two variables :
size_Y– The height of the doubleArrayinmapdata.datasize_X– The width of the doubleArrayinmapdata.data
Next, let’s declare two 3D Mesh objects without adding them to the scene :
var size_Y = mapdata.data.length;
var size_X = mapdata.data[0].length;

const material = new THREE.MeshLambertMaterial({ });
const geometry = new THREE.BoxGeometry( 2, 2, 2 );
var basic_cube = new THREE.Mesh( geometry, material );

const road_material = new THREE.MeshLambertMaterial({ color : 0x2c3e50});
var road_cube = new THREE.Mesh( geometry, road_material );
The first cube will materialize each basic block ( 0 value in the double Array ), and the second will represent each block of the path ( 1 value in the double Array ).
Next, let’s create an imbrication of two for loops, to cover each coordinate of the double Array mapdata.data .
for(var x = 0 ; x < size_X ; x++)
{
    for(var y = 0 ; y < size_Y ; y++)
    {
        //code
    }
}
This overlapping of for structures will loop on each possible coordinate of our game map.
In the overlapping of for loops, let’s create two variables: posx and posy. These last two take as a value the position of the map block to be created in function of the coordinate currently analyzed.
As a reminder, the Y axis of Three.JS corresponds to the height. This is why we position our blocks on the X and Z axes.
Thus:
var posx = (x*2) - (size_X/2)*2; // position x
var posy = (y*2) - (size_Y/2)*2; // position y ( ATTENTION, this is the Z axis in three.js universe)
Remaining in the for loops, let’s create a switch structure analyzing the value referenced at the current coordinates. Two cases are possible :
- If the value of the current coordinate is a
0, we place a basic block in the scene at the position (posx , 0 , posy) XYZ. - If the value of the current coordinate is a
1, we place a path block in the scene at the position (posx , -0.2 , posy) XYZ.
Note that the block of the path will be placed slightly lower than the basic blocks, which is why their position on the Y axis is -0.2 .
As a reminder, the Y axis of Three.JS corresponds to the height. This is why we position our blocks on the X and Z axes.
switch(mapdata.data[y][x])
{
    case 0: // If [x/y] value is 0 - We are creating a basic block
      var tmpbloc = basic_cube.clone();
      tmpbloc.position.set(posx, 0, posy);
      scene.add(tmpbloc);
    break;
    case 1: // If [x/y] value is 0 - We are creating a road block
      var tmpbloc = road_cube.clone();
      tmpbloc.scale.y = 0.8;
      tmpbloc.position.set(posx, -0.2, posy);
      scene.add(tmpbloc);
    break;
}
Our function loadMap is now finished !
Utilization of our map.js module in index.html
Now let’s load this new module into index.html . We import the variable map0_data and the function loadMap :
import {map0_data , loadMap } from './map.js';
Let’s delete the test cube added to the scene in the precedent chapter. Next, call loadMap in our initialization init function :
function init()
{
    [...]

    // ---------------- CALLING LOADING AND INIT FUNCTIONS ----------------
    loadMap(map0_data, scene);

    // ---------------- STARTING THE GAME MAIN LOOP ----------------
    render();
}
The first argument is map0_data, imported from map.js ; the second is our Three.JS scene!
To finish, our camera is a bit too close to the center of the scene, so let’s modify the line of code created in the precedent chapter :
camera.position.set(-15, 15, -15);
Final Result
Download the final code : Github.
Congratulations, you have arrived at the end of the second part! Here is the state of our project at the end of our second article :
In the next part, we will study the capture of mouse and tactile events.