
This chapter is the fourth part of our programming tutorial for our Tower Defense style game with Three.JS.
If you wish to start at the beginning, here is a link to the first part :
If you are already up to date, let’s begin!
Introduction and objective
In the precedent section, we have implemented a cursor system controlled by a mouse or tactile screen. In this new chapter, we will use this cursor to target the positions of creation for the towers in our game !
Creating and deleting Towers on our Game Map
The 3D Model of our tower
Let’s begin by creating a tower_mesh global variable in our index.html file :
var tower_mesh = undefined; // ThreeJS Mesh - TOWER
Next, in our init function, let’s create a 3D model for our tower. You can load a 3D model from an external file, or use the Three.JS primitives like in this example :
// TOWER MESH

const material = new THREE.MeshLambertMaterial({ color : 0xc0392b});
const tower_geometry = new THREE.BoxGeometry( 1, 3, 1 );
tower_mesh = new THREE.Mesh( tower_geometry, material );
If you choose the option of loading an external 3D model, you can use this link for help :
Each new tower created will be a clone of the Mesh or our variable tower_mesh.
Managing the Towers
Let’s create a towermanager.js file, then create within it an exportable TowerManager class :
export class TowerManager
{
    constructor()
    {
        //code
    }
}
In the constructor of our new class, let’s create three variables :
// ---- Tower List ----
this.towerArray = new Array();

// ---- Temporary variables ----
this.newTowerMeshToCreate = undefined;
this.selectedTower = undefined;
The variable towerArray constitutes our list, in which the towers are stored.
The two other variables are temporary containers that we will use during the creation events of a tower or for the selection of an existing tower.
Next, let’s create a simple Tower class:
class Tower
{
    constructor()
    {
        this.mesh = undefined;
    }
}
This class is for the moment simply used to store a mesh property of the Three.JS Mesh type.
Our towerArray list will stock instances of this Tower class.
When this is done, let’s continue creating our TowerManager class. Let’s create the methods addTower and deleteTower :
addTower(newtowermesh)
{
  var newtower = new Tower();
  newtower.mesh = newtowermesh;
  this.towerArray.push(newtower);
}

deleteTower(TowerObj)
{
    const index = this.towerArray.indexOf(TowerObj);
    if (index > -1) {
      this.towerArray.splice(index, 1);
    }
}
The addTower method necessitates a Three.JS Mesh type parameter. From the latter, it will create and add a Tower object in the towerArray list.
The method deleteTower accepts a Tower type parameter, and will delete it from the towerArray list.
To finish, let’s create a getTowerAtPosition method, which returns the Tower object to the given position :
getTowerAtPosition(x, z)
{
    for(var i = 0 ; i < this.towerArray.length ; i++ )
    {
        if(this.towerArray[i].mesh.position.x == x && this.towerArray[i].mesh.position.z == z )
        {
            return this.towerArray[i];
        }
    }
    return null;
}
Our model is now finished! Let’s import it into index.html, and create within it a TowerManager type global variable :
import {TowerManager } from './towermanager.js'

[...]

var towerMngr = new TowerManager();
The Graphic Interface of our Game
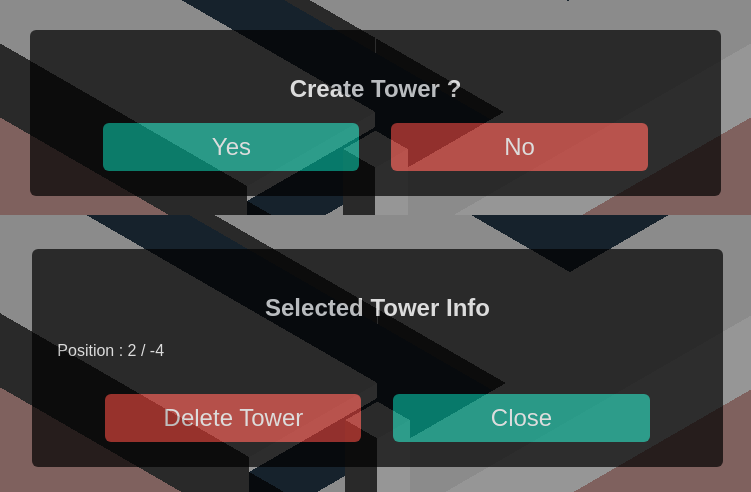
Before starting the addition and deletion of towers, let’s create a graphic interface for our game.
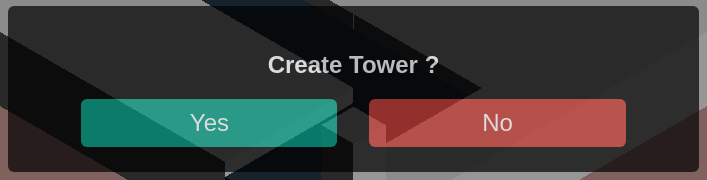
We need two pop-up windows, one for each action. Here is an overview of the interfaces that we will create :
Let’s begin by taking care of our creation pop-up in index.html :
<!-- CREATE MENU -->
<div  id="createTowerDiv" class="popupdiv">
  <h2 style="text-align : center;">Create Tower ?</h2>
  <div style="display:flex;  align-items: center; justify-content: center;">
      <button class="buttonYesNo buttonyes" id="buttonyes">Yes</button>
      <div style="width : 5%"></div>
      <button class="buttonYesNo buttonno" id="buttonno" >No</button>
  </div>
</div>
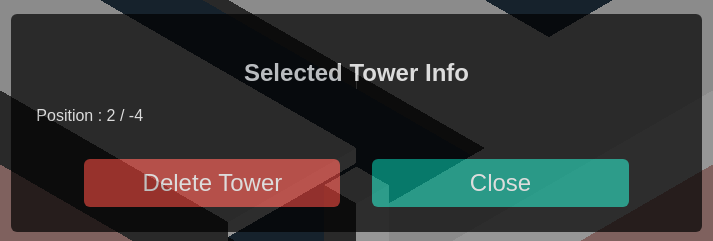
Next, let’s create the selection pop-up. This interface previews two span to display the position of the selected tower :
<!-- TOWER INFO MENU -->
<div  id="TowerInfoDiv" class="popupdiv">
  <h2 style="text-align : center;">Selected Tower Info</h2>
  <p>Position : <span id="posXinfo">NULL</span> / <span id="posZinfo" >NULL</span></p>
  </br>
  <div style="display:flex;  align-items: center; justify-content: center;">
      <button class="buttonYesNo buttonno" id="buttondelete" >Delete Tower</button>
      <div style="width : 5%"></div>
      <button class="buttonYesNo buttonyes" id="buttonclose">Close</button>
  </div>
</div>
Next, let’s take care of the CSS associated with these HTML elements :
.buttonYesNo
{
    width : 40%;
    height : 48px;

    font-size : 1.5em;
    border-radius : 6px;
    border : none;
}

.buttonyes
{
    background-color : #16a085;
    color : white;
}

.buttonno
{
    background-color : #c0392b;
    color : white;
}

.popupdiv
{
   display: none;
   opacity : 0.7;
   position : absolute;
   left : 5%;
   bottom : 5%;
   box-sizing: border-box;
   padding : 25px;
   width: 90%;
   color : white;
   font-family: roboto-font, sans-serif;
   background-color : black;
   border-radius : 6px;
}
Our two pop-ups are invisible by default, thanks to the rule CSS display : none.
Next, when the interfaces are ready, let’s create a new gui.js file. In this module, let’s produce four exportable methods :
createTowerGui_open– Open the creation interfacecreateTowerGui_close– Close the creation interfaceinfoTowerGui_open– Open the interface then fill the information fields for the selected towerinfoTowerGui_close– Close the interface of information for the selected tower
export function createTowerGui_open()
{
    document.getElementById("createTowerDiv").style.display = "block";
}

export function createTowerGui_close()
{
    document.getElementById("createTowerDiv").style.display = "none";
}

export function infoTowerGui_open(tower_posx, tower_posz)
{
    document.getElementById("posXinfo").innerHTML = tower_posx;
    document.getElementById("posZinfo").innerHTML = tower_posz;

    document.getElementById("TowerInfoDiv").style.display = "block";
}

export function infoTowerGui_close()
{
    document.getElementById("TowerInfoDiv").style.display = "none";

    document.getElementById("posXinfo").innerHTML = "NULL";
    document.getElementById("posZinfo").innerHTML = "NULL";
}
When this is done, let’s import our new module into index.html:
import {createTowerGui_open, createTowerGui_close , infoTowerGui_open, infoTowerGui_close} from './gui.js'
Thus, our interfaces are now ready. Let’s continue our project!
Reacting to Raycaster events
In the previous chapter, we have put in place a cursor based on the Raycaster Three.JS class. We will use this cursor to execute actions on our game map :
- If the targeted case is empty, we propose the creation of a tower.
- If the case is already occupied by a tower, we display the information of this tower.
Let’s begin with the onMouseUp function. In this function, let’s define on undefined the two temporary variables in our towerMnger variable ( instance of TowerManager) :
function onMouseUp(event)
{
    cursor_cube.material.emissive.g = 0;
    towerMngr.newTowerMeshToCreate = undefined;
    towerMngr.selectedTower = undefined;
}
It is now necessary to create a cursorValid global variable.
Next, in onMouseDown, when an element eligible to be targeted by the Raycaster is selected, we define the value of cursorValid on true. Otherwise, we define its value on false :
var cursorValid = false;

[...]

function onMouseDown(event)
{
      [...]
      if(intersects.length > 0)
      {
          [...]
          cursorValid = true;
      }
      else
      {
          [...]
          cursorValid = false;
      }
}
Now, we will use this variable in onMouseUp. If this latter is equal to true, we will verify if one tower is already created on the position of our cursor :
if( cursorValid)
{
    var checkTower = towerMngr.getTowerAtPosition(cursor_cube.position.x, cursor_cube.position.z);
}
Next, in our if structure, let’s use the result of the verification stored in the checkTower variable. Two cases are possible :
- The value of the
checkTowerisnull– No tower is actually created on the case; we open the interface of creation. - The value of the
checkToweris different tonull– A tower is already created on this case; we open the interface of the tower’s information.
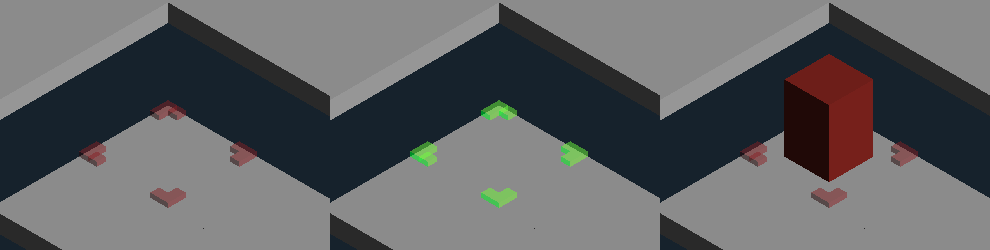
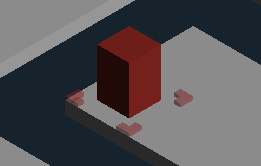
Creating a Tower
Thus, in the first case, we create a clone of tower_mesh.
Next, we attribute to it the current position of the cursor and we store this new object in the temporary newTowerMeshToCreate variable of towerMngr.
To finish, we open and close the appropriate graphic interfaces.
if(checkTower == null)
{
      var newtower = tower_mesh.clone();
      newtower.position.set(    cursor_cube.position.x, 1 , cursor_cube.position.z);
      towerMngr.newTowerMeshToCreate = newtower;

      infoTowerGui_close();
      createTowerGui_open();
}
From now on, when we select an empty space, our creation interface will open. Now we must attribute actions to the buttons Yes and No of our interface.
Let’s create a JavaScript event in our init function to react to a click on the Yes button. Next, in the function linked to this event, we will use the temporary variable newTowerMeshToCreate from towerMnger.
document.getElementById("buttonyes").addEventListener('click', function()
{
    event.stopPropagation();

    var tmpTower = towerMngr.newTowerMeshToCreate;
    scene.add(tmpTower);
    towerMngr.addTower(tmpTower);

    towerMngr.newTowerMeshToCreate = undefined;
    createTowerGui_close();
});
In this function, we add it to the scene and in the towerArray list of towerMnger, thanks to our addTower method.
Next, once the process is terminated, we will redefine the value of newTowerMeshToCreate on undefined, and we will close the interface.
We are now able to place a tower by pressing the Yes button! To finish, let’s create an event for the No button :
document.getElementById("buttonno").addEventListener('click', function()
{
    event.stopPropagation();
    towerMngr.newTowerMeshToCreate = undefined;
    createTowerGui_close();
});
This simple function reinitializes the temporary variable newTowerMeshToCreate on undefined and closes the interface.
The functionality of tower creation in our map is now finished!
Deleting a tower
Let’s return to the onMouseUp function.
If the checkTower variable is different from null, we define its content as a value of the temporary selectedTower variable . Next, we will open and close the appropriate interfaces :
if(checkTower == null)
{
    [...]
}
else
{
    towerMngr.selectedTower = checkTower;
    createTowerGui_close();
    infoTowerGui_open(checkTower.mesh.position.x, checkTower.mesh.position.z);
}
From now on, when we select a space occupied by a tower, our information interface will open.
Like in the previous part, we must now attribute actions to the Delete Tower and Close buttons of our interface.
In our init function, let’s create a JavaScript event to react to a click on the Delete Tower button.
First, our event function deletes the tower from the scene and the towerArray list of towerMnger. Next, we will close the interface and redefine the temporary variable selectedTower on undefined.
document.getElementById("buttondelete").addEventListener('click', function()
{
    event.stopPropagation();
    towerMngr.deleteTower(towerMngr.selectedTower);
    scene.remove(towerMngr.selectedTower.mesh);

    infoTowerGui_close();
    towerMngr.selectedTower = undefined;
});
Thus, we are now capable of deleting an existing tower. To finish, let’s create an event for the second button (Close) :
document.getElementById("buttonclose").addEventListener('click', function()
{
    event.stopPropagation();
    infoTowerGui_close();
});
The tower deletion function is now finished !
Finalizing the events
There remains a final step to close this chapter. In the previous chapter, we have created document.addEventListener events for the pointerdown and pointerup events.
However, it is now necessary to transform these lines of code. Let’s change document.addEventListener by renderer.domElement.addEventListener – Only for the events pointerdown and pointerup !
renderer.domElement.addEventListener('pointerdown', onMouseDown, false);
renderer.domElement.addEventListener('pointerup', onMouseUp, false);
Why this change?
When we click on the buttons of our graphic interfaces, the linked actions are correctly triggered. Nevertheless, the pointerdown and pointerup events of the document element are also activated, since a click is detected on the page!
Changing the target of these two events is now necessary.
Final Result
Download the final code : Github.
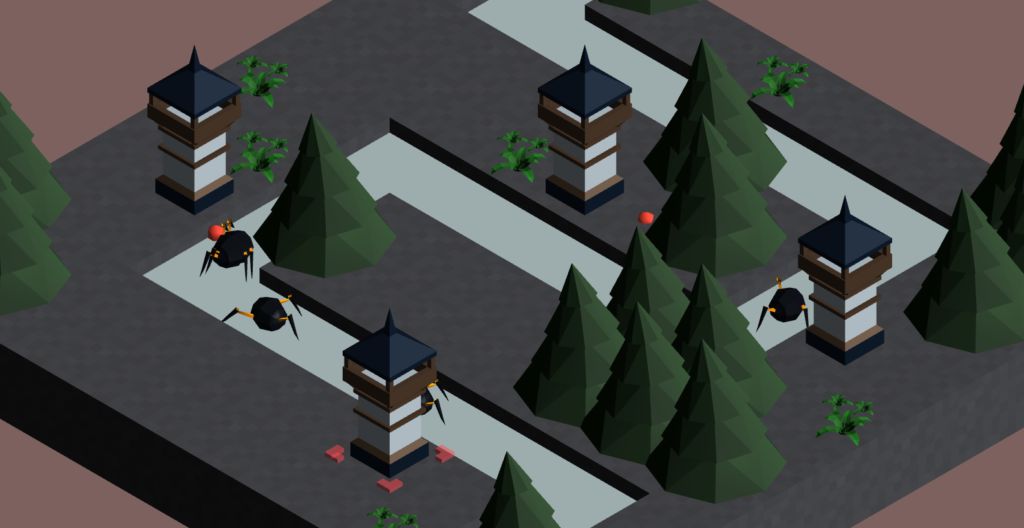
Congratulations, you have now successfully finished this new chapter. From now on, we are now able to create and delete the towers in our game map !
To finish this chapter, here is a summary of our creation :
In the next chapter, we will integrate the enemies in our game map !